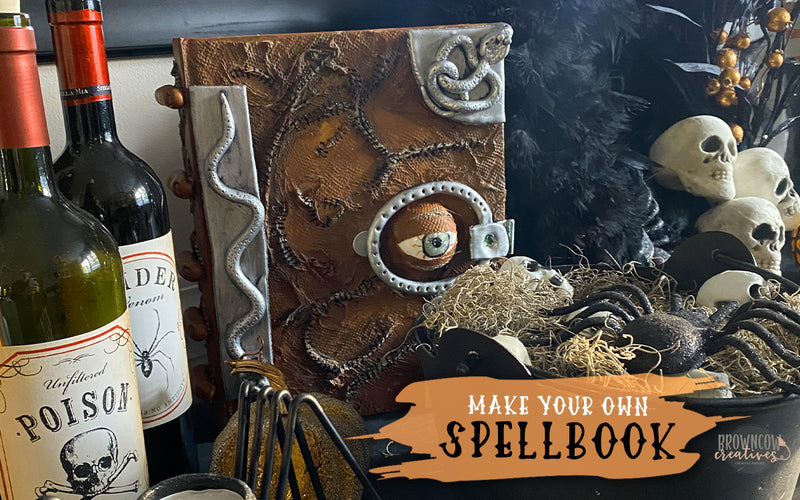
Hands down, one of my favorite projects I have ever worked on — and I’m so excited to share it. I actually did this project last year. It took me about 3 weeks since I was still teaching at the time. One of my friends has a really nice property and they always do a Haunted Trail and every family that attends gets a table and a theme. Naturally, our theme was Hocus Pocus—and our costumes and props did not disappoint! Keep reading if you want to find out how I made this monstrosity.
First, let's talk supplies. You will need the following stuff:
- A BIG book, any book. I used an old cookbook. It will be unusable after you get done with this, so make sure it isn't mom's favorite cookbook
- A big container of Mod Podge
- Paintbrushes, different sizes
- 1 styrofoam round ball, 2" or so (for the eyeball)
- Paper towels
- Paint in the following colors: green, tan/maroon, black, light cream, metallic silver
- High gloss coating for the eyeball
- Crayola Model Magic, 2 packages
- Hinge/clasps from any hardware store
- 1 small jewel of some sort, for the latch
- Black puffy paint
Let's get started. First, you will want to tear some paper towel strips, lots of them. Take a big fat paintbrush and completely saturate the strips with mod podge. Lay out the soaked pieces of paper towel all over your book and arrange them in a not-so-organized way. You want to make sure that you create ridges -- this is the "skin" of the book, so the paper towels work great to give it that skin-like texture, but you want to make sure it forms raised points all over to give it dimension.

You also want to leave a large hole on the right side of the book for the eyeball. I also intentionally ripped holes throughout the cover, so do that, too. Don't forget to do the spine! Let it dry overnight.
Once it's dry, it will be very hard and will be completely stuck to the cover of the book. The next thing do it is add the eyeball. Cut the foam ball in half and use hot glue to adhere it to the spot that you left open. Using the smallest paintbrush you have, paint the eyeball green (it's green in the movie, so that's what I went with). Once it was completely dry, I took my clear coat and covered the eye. It looks wet, like a real eyeball when you do that! After that was dry, I added the eyelid by just ripping a small piece of paper towel and covering a little bit of the iris.
 Next, it's time to paint on some shadows. Take the black paint and paint the points where the paper towel is raised. This will give it dimension when we cover it with the leather/flesh color. You also want to paint some black ovals on the spine. This is where you fingers will go.

Looking good now! Ok, so once you have that done, let's make some embellishments for the book with our Model Magic. Let me say that this stuff is amazing to work with, but it didn't dry out like I thought it would. It's a year later and this stuff is still a teensy but pliable. I still recommend it because it's just so darn easy to work with, just keep it in mind when transporting or storing it.
I really have no advice on how to do these things because I just went for it. I started over several times. You will need two coiled snakes, 5 fingers, a braided rope (measure the depth of the book for this, it will go on the side and act as the "latch"), and the round latch that will go around the eyeball. You will also need a long snake for the left side of the book.I used a sharp pencil to poke tiny holes in the snakes to give them texture. Same thing for the round latch.


Let these dry for at least a day. I actually let them dry for almost a week, and they were still pliable, but they are so easy to work with. They will keep their shape as long as you aren't manhandling them. I painted them all black to start once they were dry, again to create those shadows underneath the main color.
The fun part! Once you start painting it, you really start to see the project come alive. I used a maroon/leathery color and some cream/tan highlights. I just started painting and kept tweaking it a little bit by adding highlights. It turned out better than I had hoped! Especially with those dark shadows that I created by painting on the black first.

Last, I painted the embellishments a silver metallic to make them look like real silver additions. I love that metallic paint! It looks so authentic to me.

Don't forget the stitches! The stitches add the most interesting feature of the whole thing, because it's all skin that's sewn together, right? I used black puffy paint with a very small tip to just draw on my stitches.
Then I added the fingers to the spine and used my hardware to create a working latch (although I never open it because why would I??) and my spell book was complete! I LOVE this book and it is now an integral part of our Halloween display.


The Sanderson Sisters really enjoyed having this book for our Halloween party! It was the perfect touch to our whole theme. It was a lot of work, not gonna lie, but the end result is absolutely worth it and now I have this book to show off every Halloween!

Happy Halloween!
0 comments